I originally saw these windows in Germany but they are widely used throughout Europe, and particularly Scandinavia, where the excellent insulation is essential. Most of Europe likes timber as it is everywhere, although there is a small presence of the dastardly plastic in the cities, along with a lot more powder coated metal with thermal breaks.
Almost all of them are inward opening, tilt and turn, which makes cleaning easy from the inside and use a standard mechanism, usually from Roto. YOu can leave them open in the rain without drowning your windowsill.

The weather resistance is outstanding with internal drain channels discharging into a special alloy bottom rail which runs the water out to an alloy cill. This deals with the most common cause of rot, the cill, and an additional profile is available to cover the bottom rail of the casement for additional protection. There is a substantial compression seal, much larger than the standard UK wiping seal, which can be augmented by a second seal on the inner rebate for complete draught proofing. There are 3 rebates on the casement, two to provide positive location against the frame and a central one to control the compression on the seal.


In my case I chose triple glazing, owing to the extreme exposure of the site and the large glazed area in our 1960's house. This consisted of 4/12/4/12/4 with K glass on the inside and argon filled. South facing units were additionally bronze tinted to control excess solar gain which proved very effective.
In my case I chose Douglas Fir (also known as Columbian or Oregon Pine) for it's high resin content which resists rot and attractive grain but it is not an easy timber to work with highly defined growth rings which can deflect hand tools and frequent resin pockets and alternating grain. The timber is prone to surface checking and splinters easily which usually turn septic owing to the resin. In some cases the dust and resin can be a skin irritant. It is expensive and often found in the offices of our ever frugal public servants.
External finish is usually porous Sadolin or Sikkens.
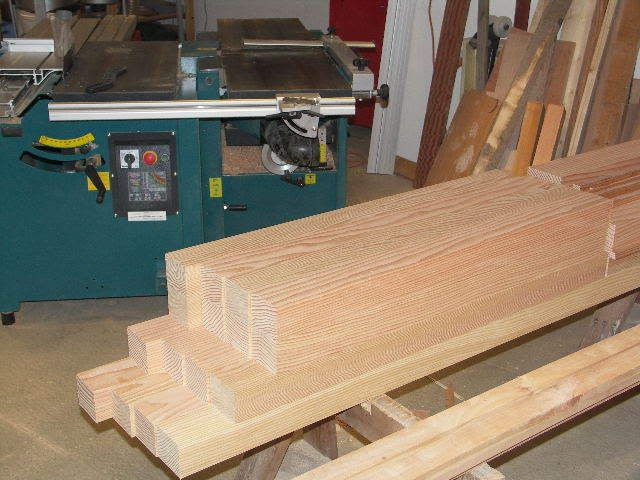
Our house required 37 casements in 1 to 4 pane units, two big tilt and slide patio doors, with glazed panels either side, and two glass walls, one single and one 2 story. If I had realised how much work this was at the outset I would have chosen a different approach but I was keen to make them myself. Although I had a universal machine, with tilting spindle moulder, saw and planer thicknesser I was not intending to become a commercial maker and so did not feel the £4500 investment in purpose spindle tooling was justified. (Maybe not true with hindsight!) Consequently I made them all with standard rebate blocks and slotters.
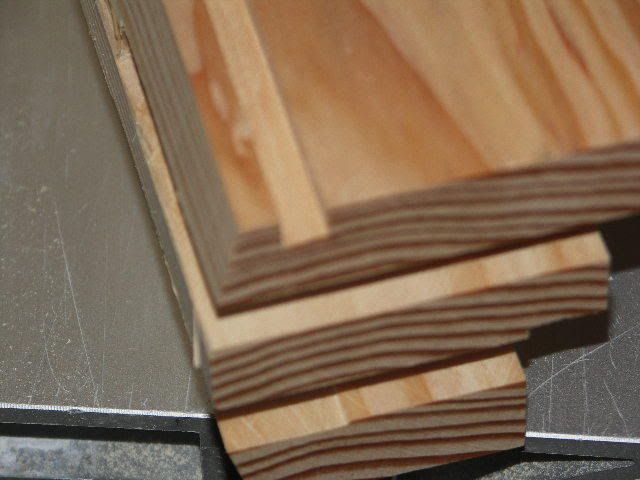
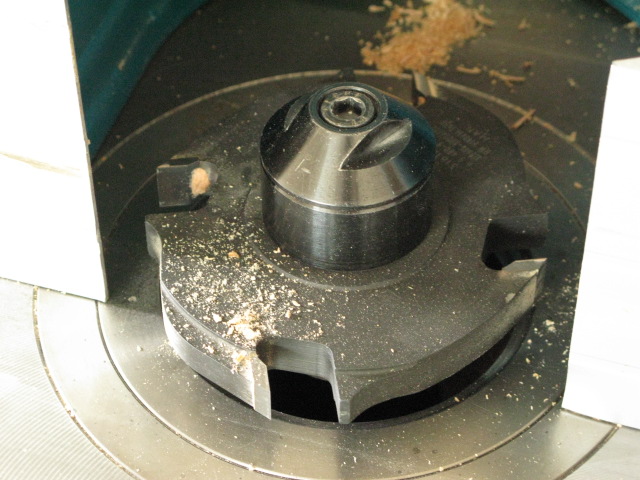
The design is based on double bridles and stepped shoulders match the rebates. The stock is all 80 x 68 thick with 1 off 8mm and 1 off 10mm tenons per corner, positioned to match the rebates. Felder do a useful book with dimensions of all the layouts including arched tops and double doors, although there is an error in the basic casement size calculation, so proceed with caution. The original versions of this style had external pivot hinges in the bottom corner needing only 18mm rebates for the stays but more recent designs require 20mm rebates and the gear is completely concealed. The good gear was called Roto Royale but this has since been superceded by ST which works but is not so well engineered. On the positive side it is easier to fit. All the gear fits in a standard Eurogroove which for the uninitiated is a 12.3mm square rebate under a 16 x 2 cover strip housing on the surface. It is worth buying a dedicated cutter to make Eurogrooves as they save a lot of time.
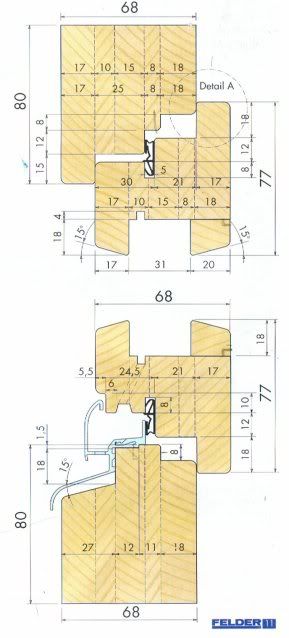
There was quite a bit of work just getting the timber to size. Both inner and outer are 80 x 68 in this version.
I used a rod to mark out the dimensions. It is easy to lose your way so I ended up marking each piece of the bridle joints. First the mortices were cut in the top and bottom rails for multi openers while still square.

The bridles are a bit of a brain teaser

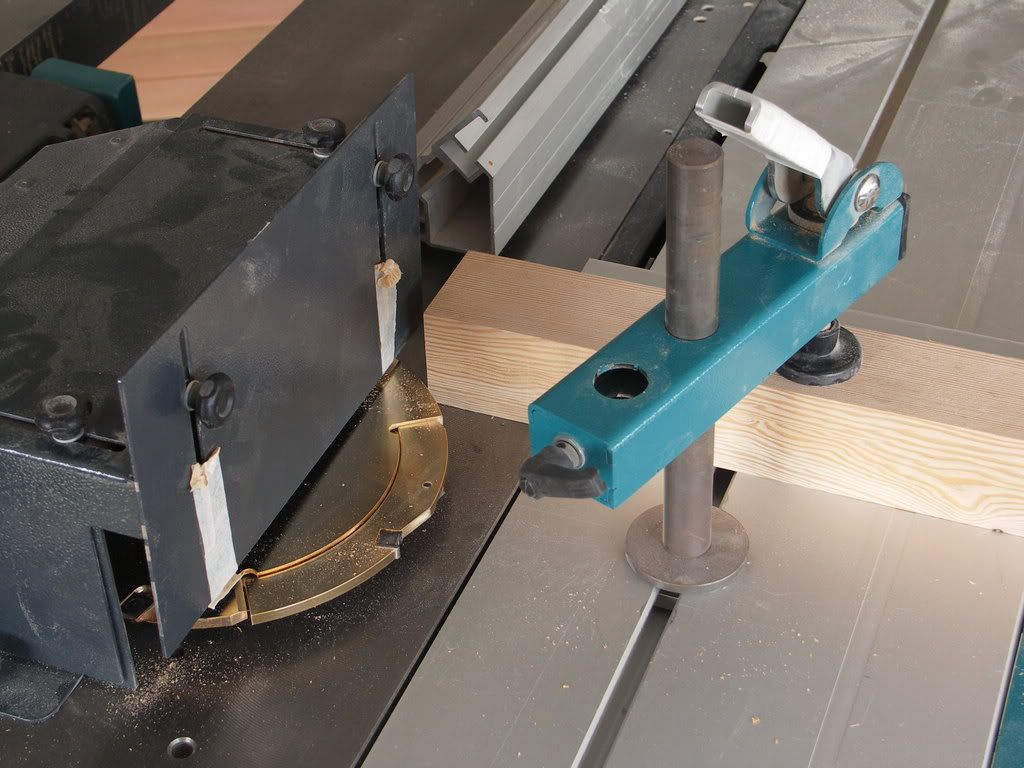
Tenons on long sections were cut on the bandsaw


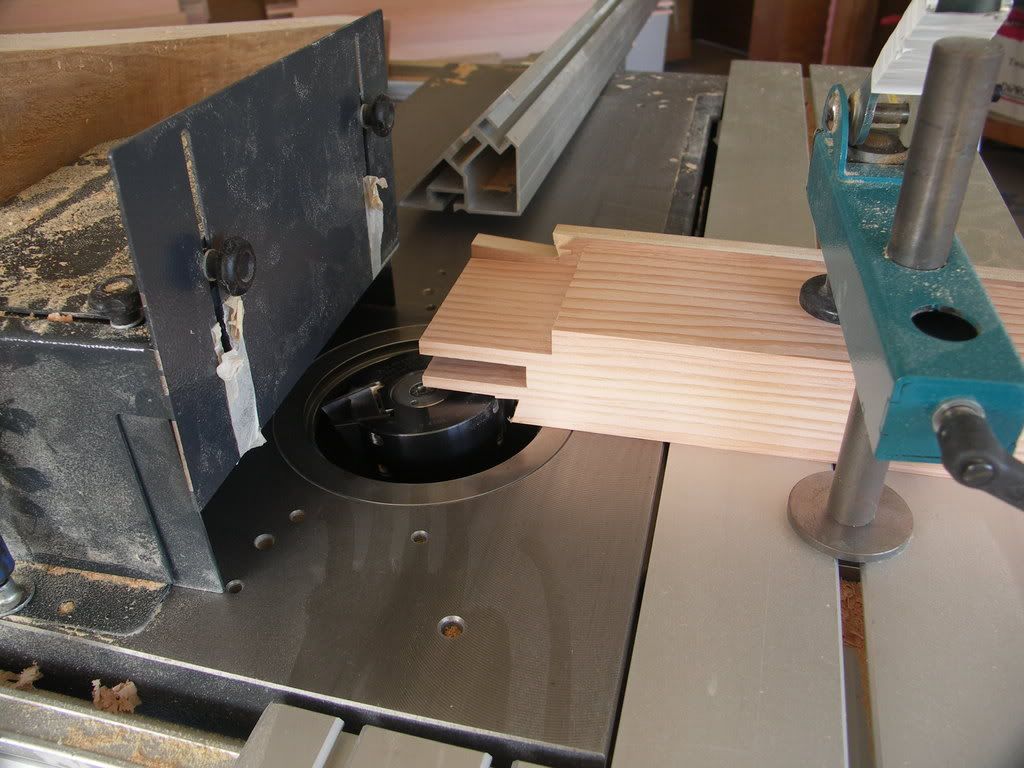
The vertical and short lengths are cut on the spindle using a 250mm adjustable slitter.
I had to use a tennoning hood, rather than the normal moulding fence, owing to the cutter diameter, so used the rip fence to position the rails before clamping to the sliding table for the cut.

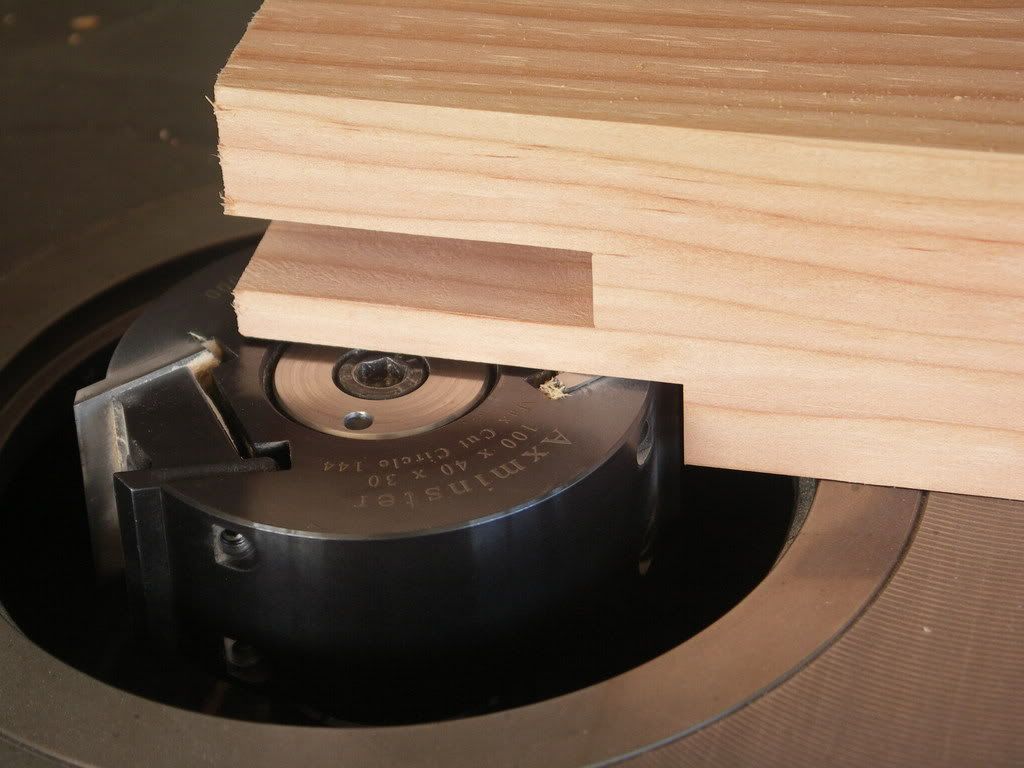
The tenon shoulders were cut using a special cap in the recessed head. I had this one made but gather they are now available from Wealdens.
I did try various ways of trimming the scribe with a chamfer knife and the spindle tilted and on the table saw with an extension sacrificial fence but, in the end, it proved quicker to saw them by hand with an angles guide block.
Slotting cut were made with backers to prevent spelching

On the long rails the rebates were run on before the shoulders were cut but this proved to be a mistake as it was more difficult to sight the lines

Rails and stiles waiting for moulding


Let the glue up begin. The casements were made on a building board to ensure squareness and the frames on the floor with a carful check of the diagonals with extending rods.

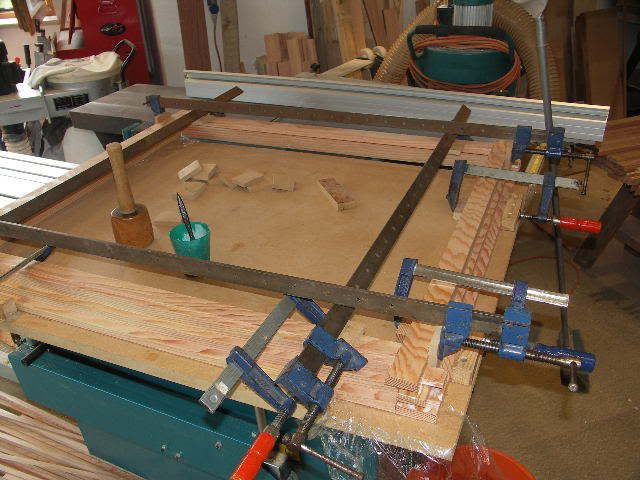
There was quite a pile of them


I quickly ran out of building space

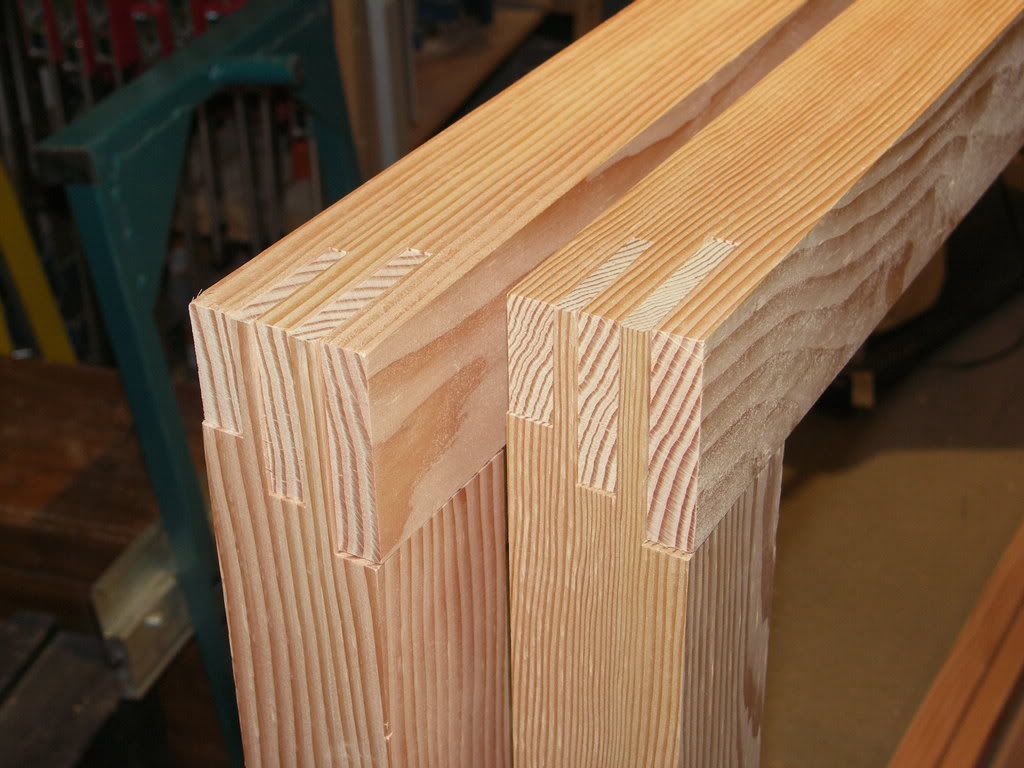
The Eurogroove and seal groove are best done when the casement is glued up so that the corners don't need any later cleaning up and they all line up!
Purpose made EG cutter
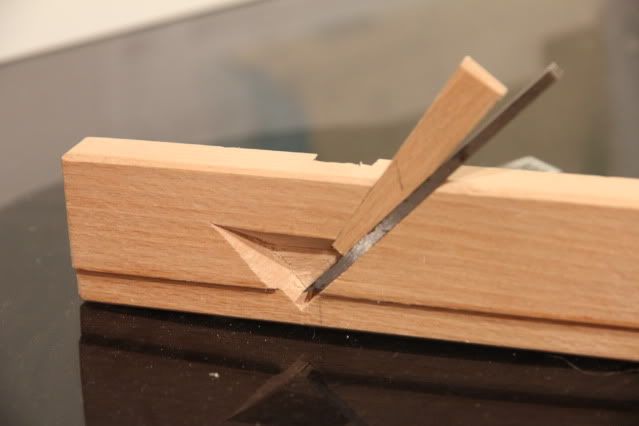
I made a little special plane to clean the shoulder of the groove on some I had made before I had the above cutter. I just used a blade from a Stanley plough. It worked well and could be set LH or RH but note the mistake on the width of the mouth.
Final job before the hardware is the drainage arrangements. I had put a 10mm square internal gutter along the inside of the bottom of the glazing rebate and drained this with 8mm holes at 150mm pitch having previously had trouble with less. I had a jig to ensure I hit the gutter when drilling up from the middle of the drip.
Effective drainage is vital to give the fragile glazing seals the best chance of survival, especially on triple glazing which has twice the chance of failing as double!


Time for some hardware. Starting with the botttom corner hinge the corners are fitted first and then joined with the connector strips with the multi point rollers.


2 comments:
Excellent stuff, Brian. As we've discussed before, I'll never understand why these windows have not caught on over here - they are so very good.
Cheers ;-)
Paul Chapman
Thanks for posting this great write up. It's been a while since it was posted, do you have any notes on the longevity of your method? Noticed any wood movement etc? Any thoughts would be appreciated.
Post a Comment